この記事では、Androidアプリ開発でボタンを水平に配置する4つの方法をメモします.
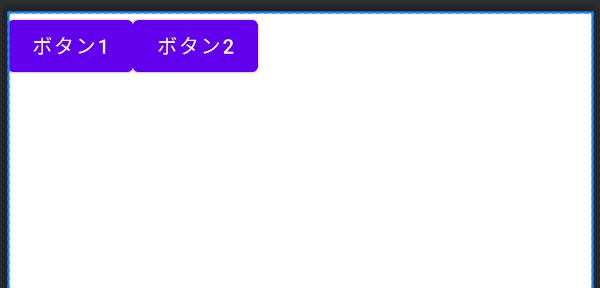
コピペで以下のボタンを作れます.

LinearLayoutを使用する
<LinearLayout
    android:layout_width="match_parent"
    android:layout_height="wrap_content"
    android:orientation="horizontal">

    <Button
        android:layout_width="wrap_content"
        android:layout_height="wrap_content"
        android:text="ボタン1" />

    <Button
        android:layout_width="wrap_content"
        android:layout_height="wrap_content"
        android:text="ボタン2" />
</LinearLayout>
ConstraintLayoutを使用する
<androidx.constraintlayout.widget.ConstraintLayout
    android:layout_width="match_parent"
    android:layout_height="wrap_content">

    <Button
        android:id="@+id/button1"
        android:layout_width="wrap_content"
        android:layout_height="wrap_content"
        android:text="ボタン1"
        app:layout_constraintStart_toStartOf="parent"
        app:layout_constraintTop_toTopOf="parent" />

    <Button
        android:id="@+id/button2"
        android:layout_width="wrap_content"
        android:layout_height="wrap_content"
        android:text="ボタン2"
        app:layout_constraintStart_toEndOf="@id/button1"
        app:layout_constraintTop_toTopOf="parent" />
</androidx.constraintlayout.widget.ConstraintLayout>
RelativeLayoutを使用する
<RelativeLayout
    android:layout_width="match_parent"
    android:layout_height="wrap_content">

    <Button
        android:layout_width="wrap_content"
        android:layout_height="wrap_content"
        android:text="ボタン1"
        android:id="@+id/button1" />

    <Button
        android:layout_width="wrap_content"
        android:layout_height="wrap_content"
        android:text="ボタン2"
        android:layout_toRightOf="@id/button1" />
</RelativeLayout>
GridLayoutを使用する
<GridLayout
    android:layout_width="match_parent"
    android:layout_height="wrap_content"
    android:rowCount="1"
    android:columnCount="2">

    <Button
        android:layout_width="wrap_content"
        android:layout_height="wrap_content"
        android:text="ボタン1" />

    <Button
        android:layout_width="wrap_content"
        android:layout_height="wrap_content"
        android:text="ボタン2" />
</GridLayout>
まとめ
単なる備忘録です.


